This tutorial shows how to use the PDF Flow Builder step by step on the live PDF Toolkit site. You will learn the quickest starter workflow using the default flow (PDF Input → Compress PDF → PDF Output), upload a PDF, configure output packaging, run the flow, and review execution results.
Why Use PDF Flow Builder?
Visual PDF Workflows
Build PDF processing pipelines visually using connected nodes such as input, transform, and output.
Per-Node Configuration
Select each node to configure upload files, transform behavior, and output packaging in the side panel.
Execution Progress + Results
Run the flow and review the Execution panel summary (Total, Done, Failed, Outputs) for each file.
Follow the same toolbar buttons and panel labels shown below in the live PDF Flow Builder.
Open PDF Flow BuilderQuick Walkthrough (GIF)

This GIF shows the quick-start flow: select the starter nodes, upload a PDF, set output packaging, and click Run Flow.
How to Use PDF Flow Builder (Step by Step)
Open the Flow Builder and Review the Starter Flow

Open the tool and review the workspace layout:
- Node Palette on the left (IO, Transform, Helper nodes)
- Canvas in the center with the default starter flow already connected
- Config panel on the right for the selected node
- Execution panel at the bottom for run progress and results
Select “PDF Input” and Upload Your PDF File

Click the PDF Input node in the canvas. In the right-side Config panel, use the Batch Files section to upload one or more PDFs.
After upload, the file list appears in the panel and the top toolbar updates the file badge (for example, 1 file). The Run Flow button becomes enabled.
Review the “Compress PDF” Node Settings

Click the Compress PDF node to open its configuration panel. The starter flow uses the safe strategy:
- Strategy → Rewrite PDF structure (safe)
- This rewrites the PDF bytes and can reduce size for some files
Set the “PDF Output” Archive Name and Package Mode
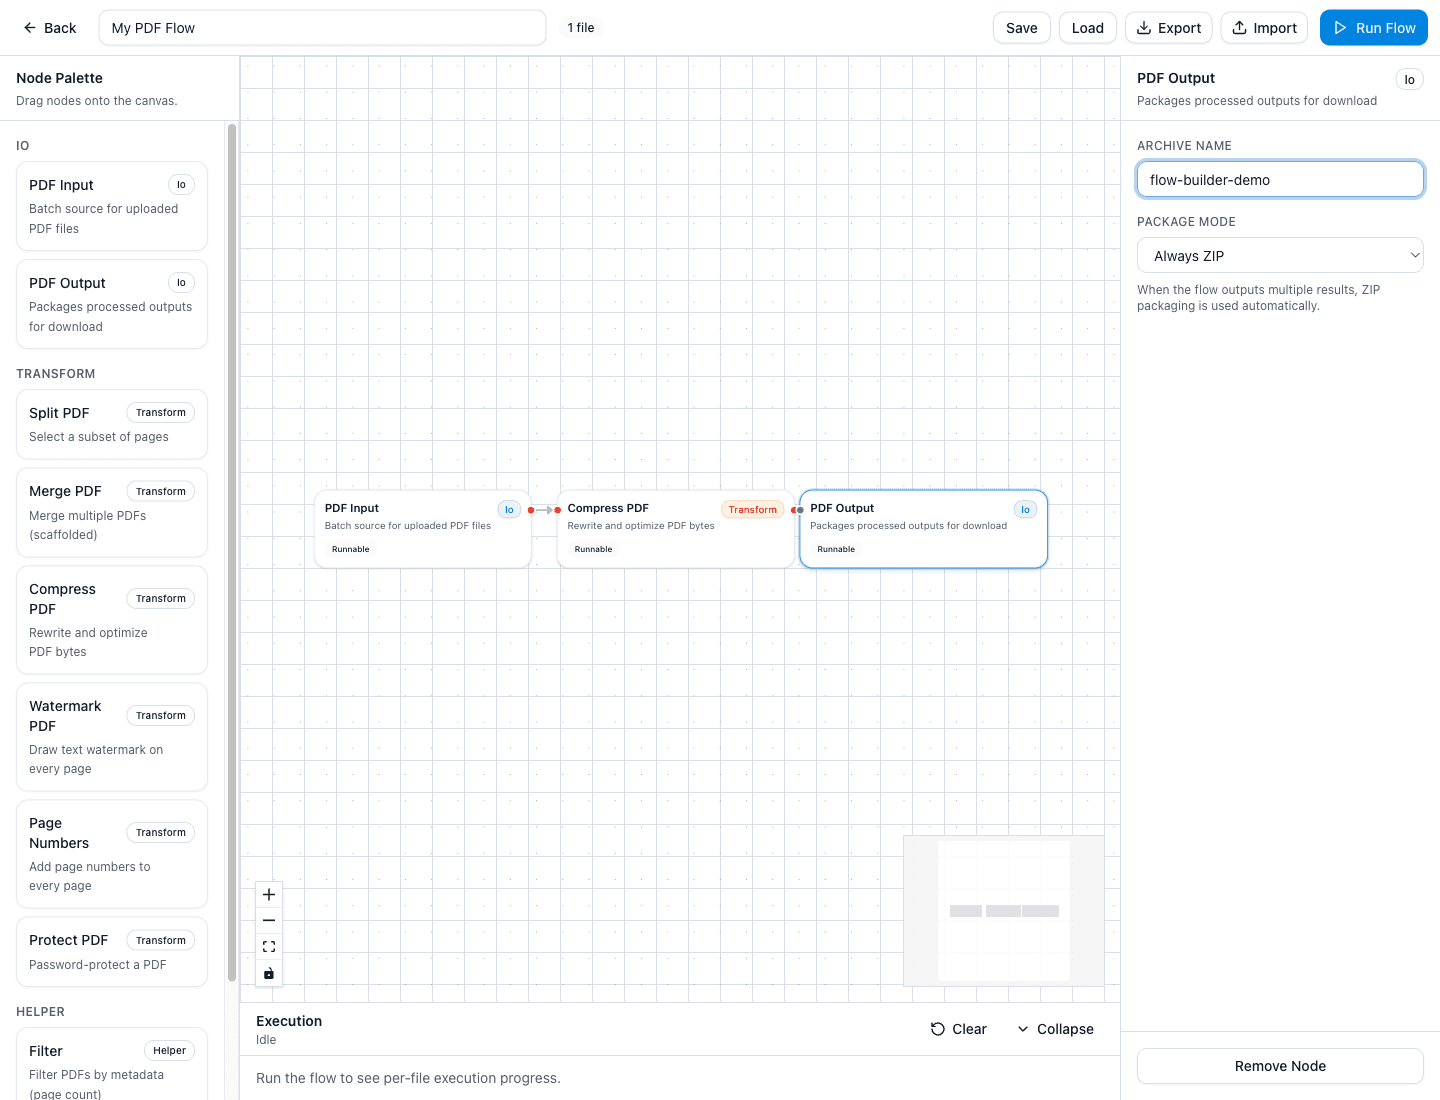
Click the PDF Output node and configure how the final files are downloaded.
- Archive Name: set a custom name like flow-builder-demo
- Package Mode: choose Always ZIP if you want a ZIP download even for one file
- Use Auto when you want the tool to decide between direct file download vs ZIP
Click “Run Flow” and Review the Execution Panel
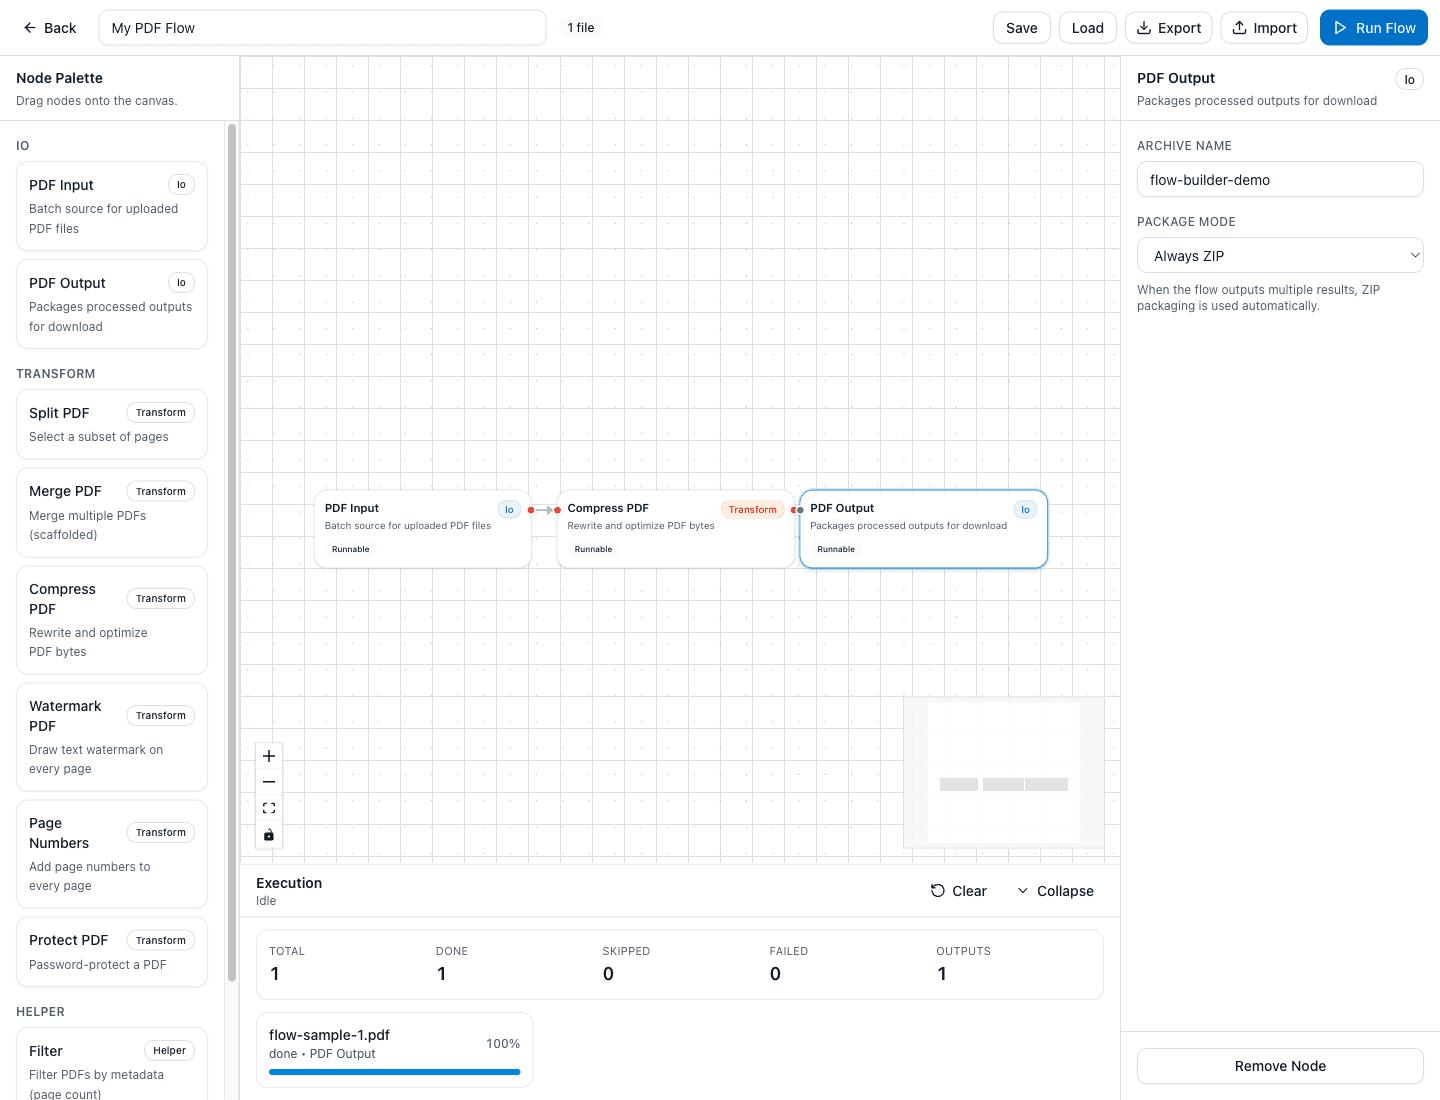
Click Run Flow in the top toolbar. The builder processes the uploaded PDF through the connected nodes and updates the bottom Execution panel.
- Summary stats show Total, Done, Skipped, Failed, and Outputs
- The per-file row shows progress and the current/final node label (for example, done • PDF Output)
- With Always ZIP, the final download is a ZIP like flow-builder-demo.zip
Extra Tips (Save, Load, Export, Import)
- Use Save to store your flow in local storage and Load to restore it later.
- Use Export to download the flow definition as JSON so you can share or back it up.
- Use Import to load a previously exported flow JSON file.
- Drag additional nodes from the Node Palette (like Split PDF, Watermark PDF, or Rename) onto the canvas to extend your workflow.
- If a node is selected by mistake, click the canvas area to clear selection and return to the default Config panel state.
Try the Tool
Use the live PDF Flow Builder to create reusable PDF processing pipelines and run them directly in your browser.